 Loading... Please wait...
Currency Displayed in
- Home
- Charge Bracket Instructions
Categories
Charge Bracket Instructions
Charge Bracket Instructions
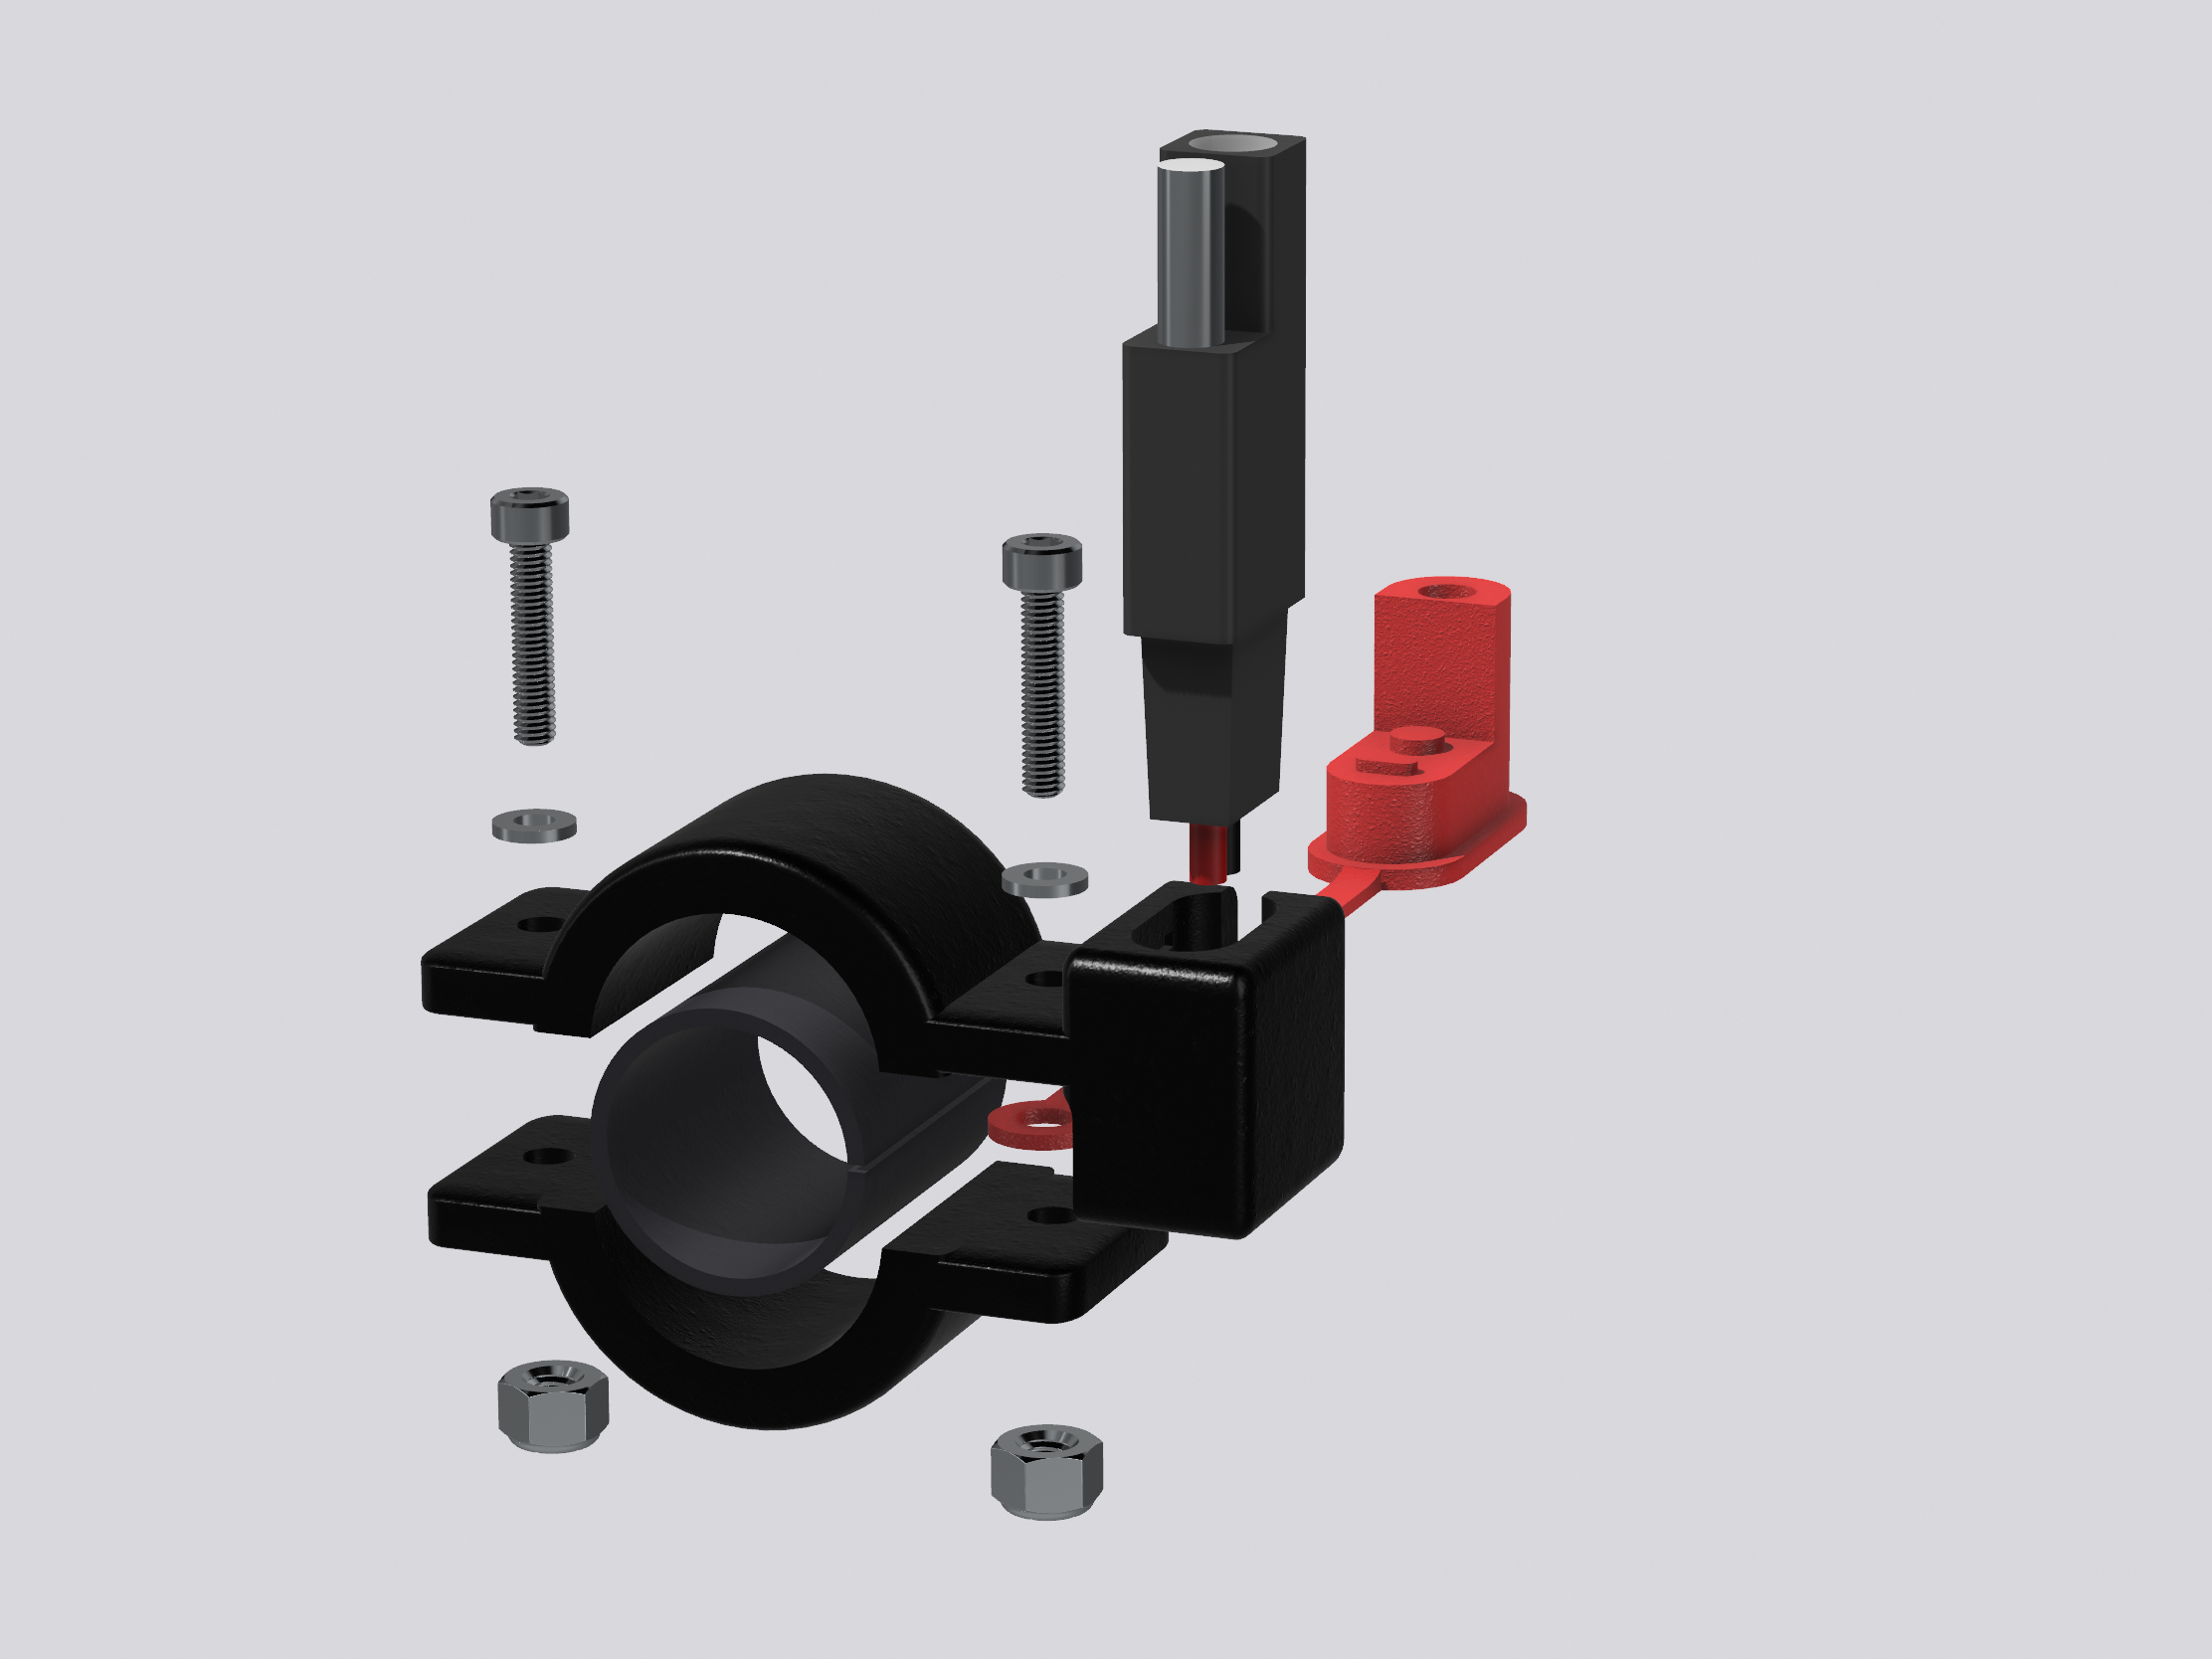
The 3D assembly drawing should make installation clear.

Check the protective pad on the tube to ensure it doesn’t overlap. Trim it as necessary.
Use some E6000 or some type of adhesive on the pad and tape in place at the desired location. This makes installing a little easier and eliminates the need for the “3rd” hand.
Utilize the included 5/8” x 6-32 bolts as shown. Remember to install the dust cover between the two halves of the bracket.
Tighten to snug and test that the bracket can’t be easily moved on the mount. Tighten to eliminate movement.
The charge plug can be inserted into the receptacle. I recommend that you use E6000 or silicon in the receptacle when you insert the plug for the final time.
Wire to your battery as desired. On my RV7 I have an EarthX battery mounted FWF and near the bracket. I ran a lead directly to the positive lead on the battery. The ground was bolted to the firewall at a shared ground point.


